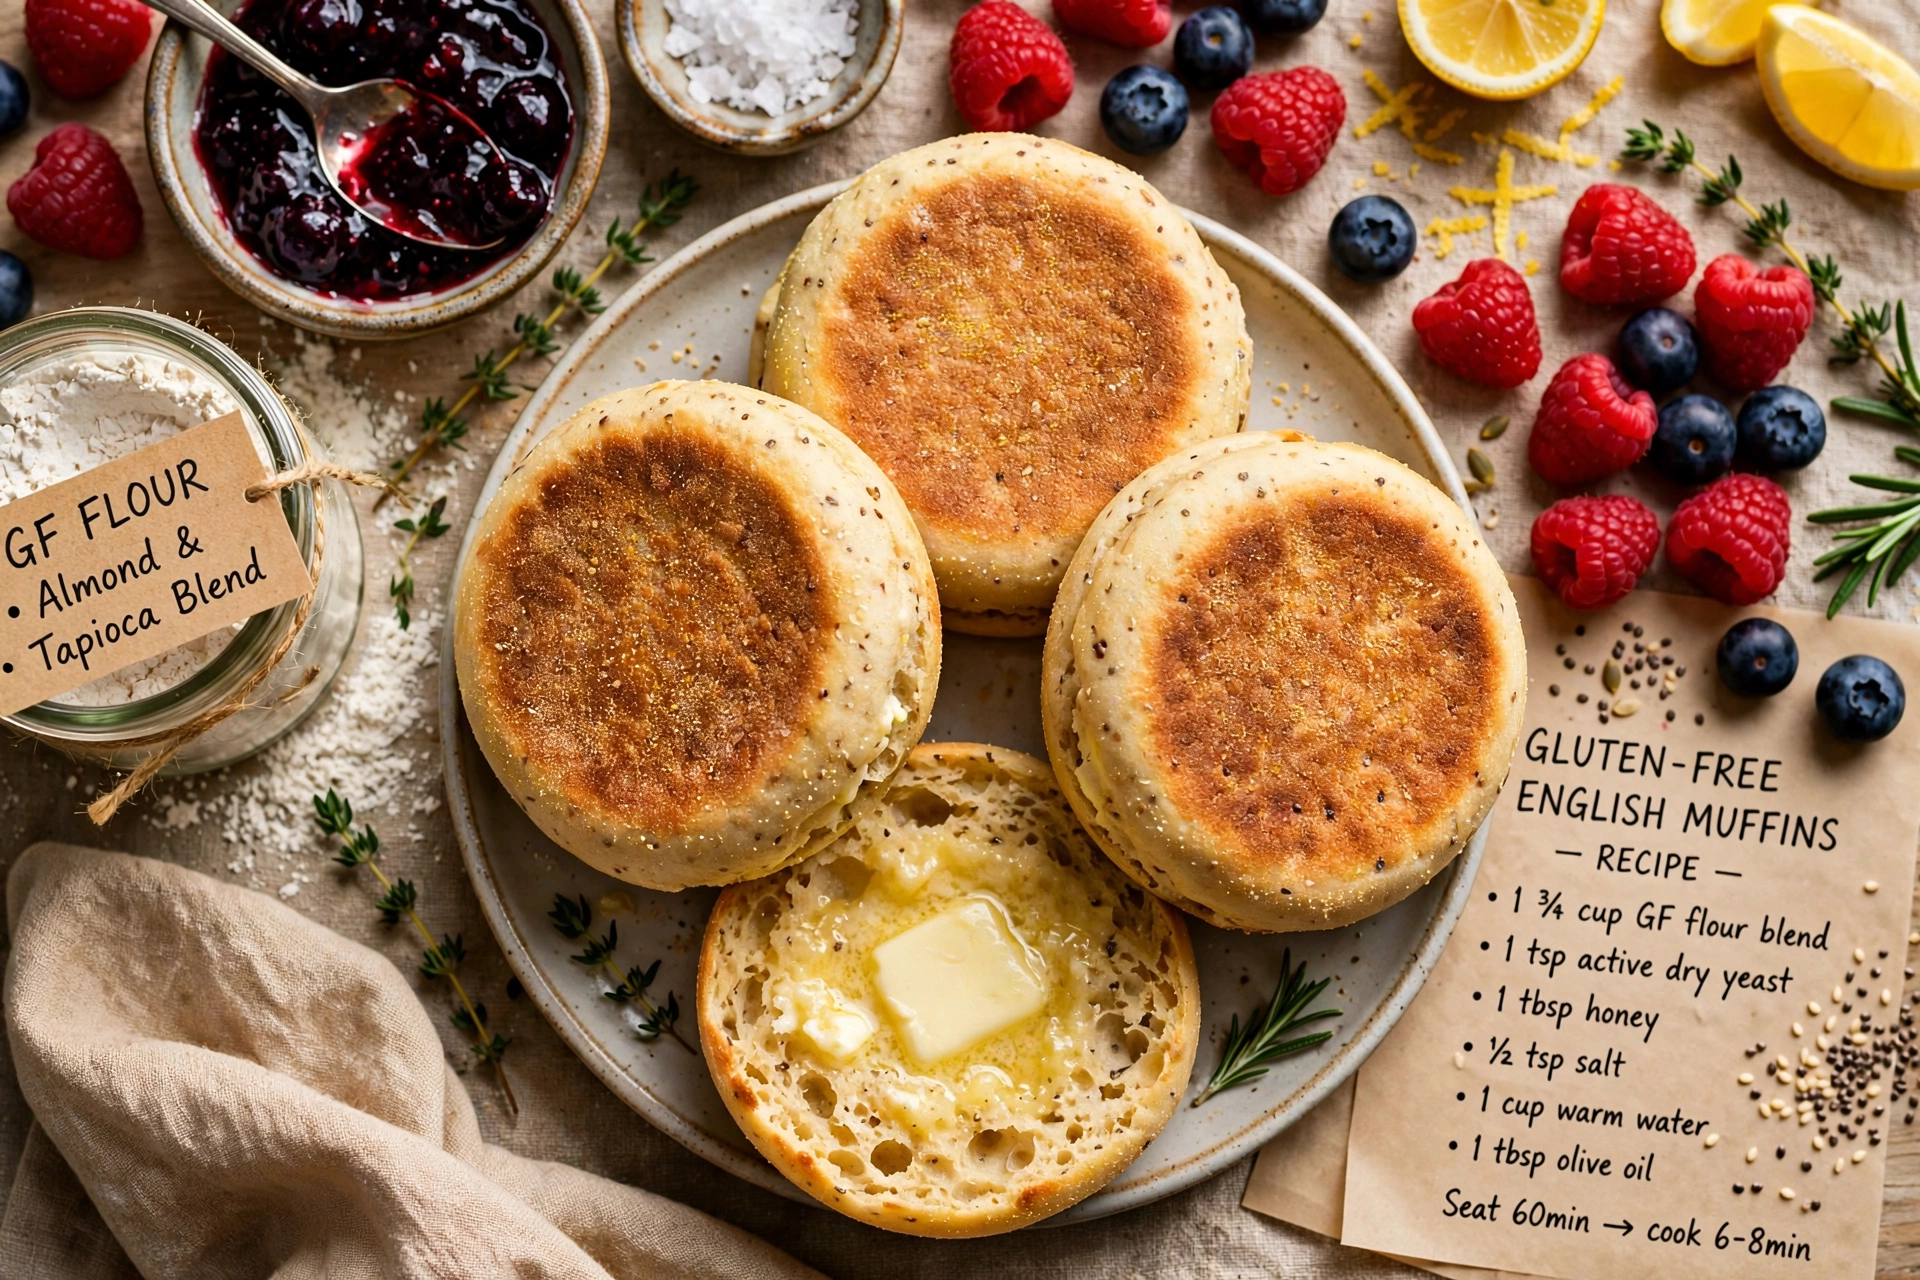
Gluten-Free English Muffins
Soft, fluffy gluten-free English muffins with all those signature nooks and crannies, made at home with simple pantry ingredients and no gluten in sight.
Finally, Gluten-Free English Muffins That Actually Have Nooks and Crannies
If you have missed English muffins since going gluten free, this recipe is going to make your morning. These gluten free English muffins come out soft, slightly chewy, and packed with the little tunnels and pockets that are perfect for catching melted butter or a puddle of jam. No gluten, no dry crumbly texture, and no giving up on your favorite breakfast bread.
Most gluten free recipes bread attempts end up dense or gummy, but this one uses a wet, batter-like dough cooked low and slow on the stovetop, which is actually the traditional way English muffins have always been made. It just happens to work beautifully without gluten too.
Before we get cooking, the right tools and ingredients make a real difference here. A good gluten-free flour blend that already includes xanthan gum will save you a step, and a reliable nonstick skillet or griddle is essential for even, gentle cooking without scorching the outside before the inside is done. These are the products that genuinely help this recipe shine:
Why This Dough Feels So Different
If you have made gluten free sourdough or other gluten free bread recipes before, you might expect to knead this dough. You will not. It is closer to a thick pancake batter than a bread dough, and that is completely normal.
- The batter should be thick enough to hold a scoop shape but too sticky to knead by hand.
- Letting it rest and puff up for a full 45 to 60 minutes is what builds the airy structure.
- Cornmeal on the outside is not just for flavor, it also keeps the sticky dough from fusing to your work surface.
Chef's Tip: Resist the urge to crank up the heat to speed things along. Low and slow is what gives these muffins a golden crust without leaving the center gummy.
A Few Notes on Ingredients
This recipe was built with gluten free dairy free recipes in mind too. Swap the milk for your favorite plant-based milk and use a dairy-free butter, and you will barely notice the difference. It is one of the easier ways to make homemade gluten free breakfast bread that works for a lot of different diets at once.
A quality all-purpose gluten free flour blend really matters here. Blends vary a lot in starch content, and some already include xanthan gum while others do not. Check your label so you know whether to add it separately, since too much xanthan gum can make the crumb rubbery instead of tender.
For anyone newer to baking without foods with gluten, this is a genuinely forgiving recipe to start with. There is no shaping skill required, no gluten development to worry about, and the skillet does most of the work.
Ready to make it? Here is the full step by step recipe:
Gluten-Free English Muffins
Soft, fluffy gluten-free English muffins with all those signature nooks and crannies, made at home with simple pantry ingredients and no gluten in sight.
Ingredients
- 2 1/2 cups gluten-free all-purpose flour blend, one with xanthan gum already included, like Bob's Red Mill 1-to-1
- 1/2 tsp xanthan gum, omit if your flour blend already contains it
- 2 tbsp granulated sugar
- 2 1/4 tsp instant yeast, one standard packet
- 1 tsp fine sea salt
- 1 cup milk, warmed to about 110°F, dairy-free milk works too
- 3 tbsp unsalted butter, melted, or use dairy-free butter for a dairy-free version
- 2 large eggs, room temperature
- 1 tsp apple cider vinegar, helps with rise and texture
- 3 tbsp cornmeal, for dusting
Instruction
In a large bowl, whisk together the gluten-free flour blend, xanthan gum (if using), sugar, instant yeast, and salt.
In a separate bowl or measuring cup, combine the warm milk, melted butter, eggs, and apple cider vinegar. Whisk until smooth.
Pour the wet ingredients into the dry ingredients and beat with a hand mixer or sturdy spoon for about 2 minutes, until you have a thick, sticky, batter-like dough. It will not look like traditional bread dough, and that is exactly right.
Cover the bowl with plastic wrap or a damp towel and let it rest in a warm spot for 45 to 60 minutes, until noticeably puffy.
Heat a large nonstick skillet or griddle over low to medium-low heat. Generously sprinkle a clean work surface or a sheet of parchment with cornmeal.
Using a greased 1/2 cup measure or an ice cream scoop, drop mounds of dough onto the cornmeal, then sprinkle more cornmeal on top and gently shape into rough 3-inch rounds, about 3/4 inch thick.
Lightly grease the skillet and cook the muffins in batches, 6 to 8 minutes per side, until deeply golden and cooked through in the center. Lower the heat if they are browning too fast.
Transfer cooked muffins to a wire rack to cool for at least 10 minutes before splitting.
Split with a fork rather than a knife to create those classic nooks and crannies, then toast and serve with butter or your favorite toppings.
Equipment
- Large mixing bowl
- Hand mixer or sturdy whisk
- Nonstick skillet or griddle
- 1/2 cup measuring cup or ice cream scoop
- Wire cooling rack
Notes
Serving, Storing, and Toasting Tips
Once your muffins have cooled, split them with a fork rather than a knife. Pulling the fork around the edge instead of slicing straight through is what preserves all those craggy air pockets, and it is a small step that makes a real difference.
These muffins are fantastic for:
- A classic breakfast sandwich with egg and cheese
- Toasted with butter and jam alongside coffee
- A quick base for mini pizzas at lunch
Store them in an airtight container at room temperature for up to three days, or freeze the whole batch for up to three months. Frozen muffins can go straight into the toaster, no thawing required.
Chef's Tip: If you are meal prepping, split the muffins before freezing. You will thank yourself later when you can toast individual halves straight from the freezer.
Once you get the hang of this method, it opens the door to other gluten free recipes easy enough for a weekday morning, all built on the same forgiving, no-knead technique. Welcome back to English muffins.