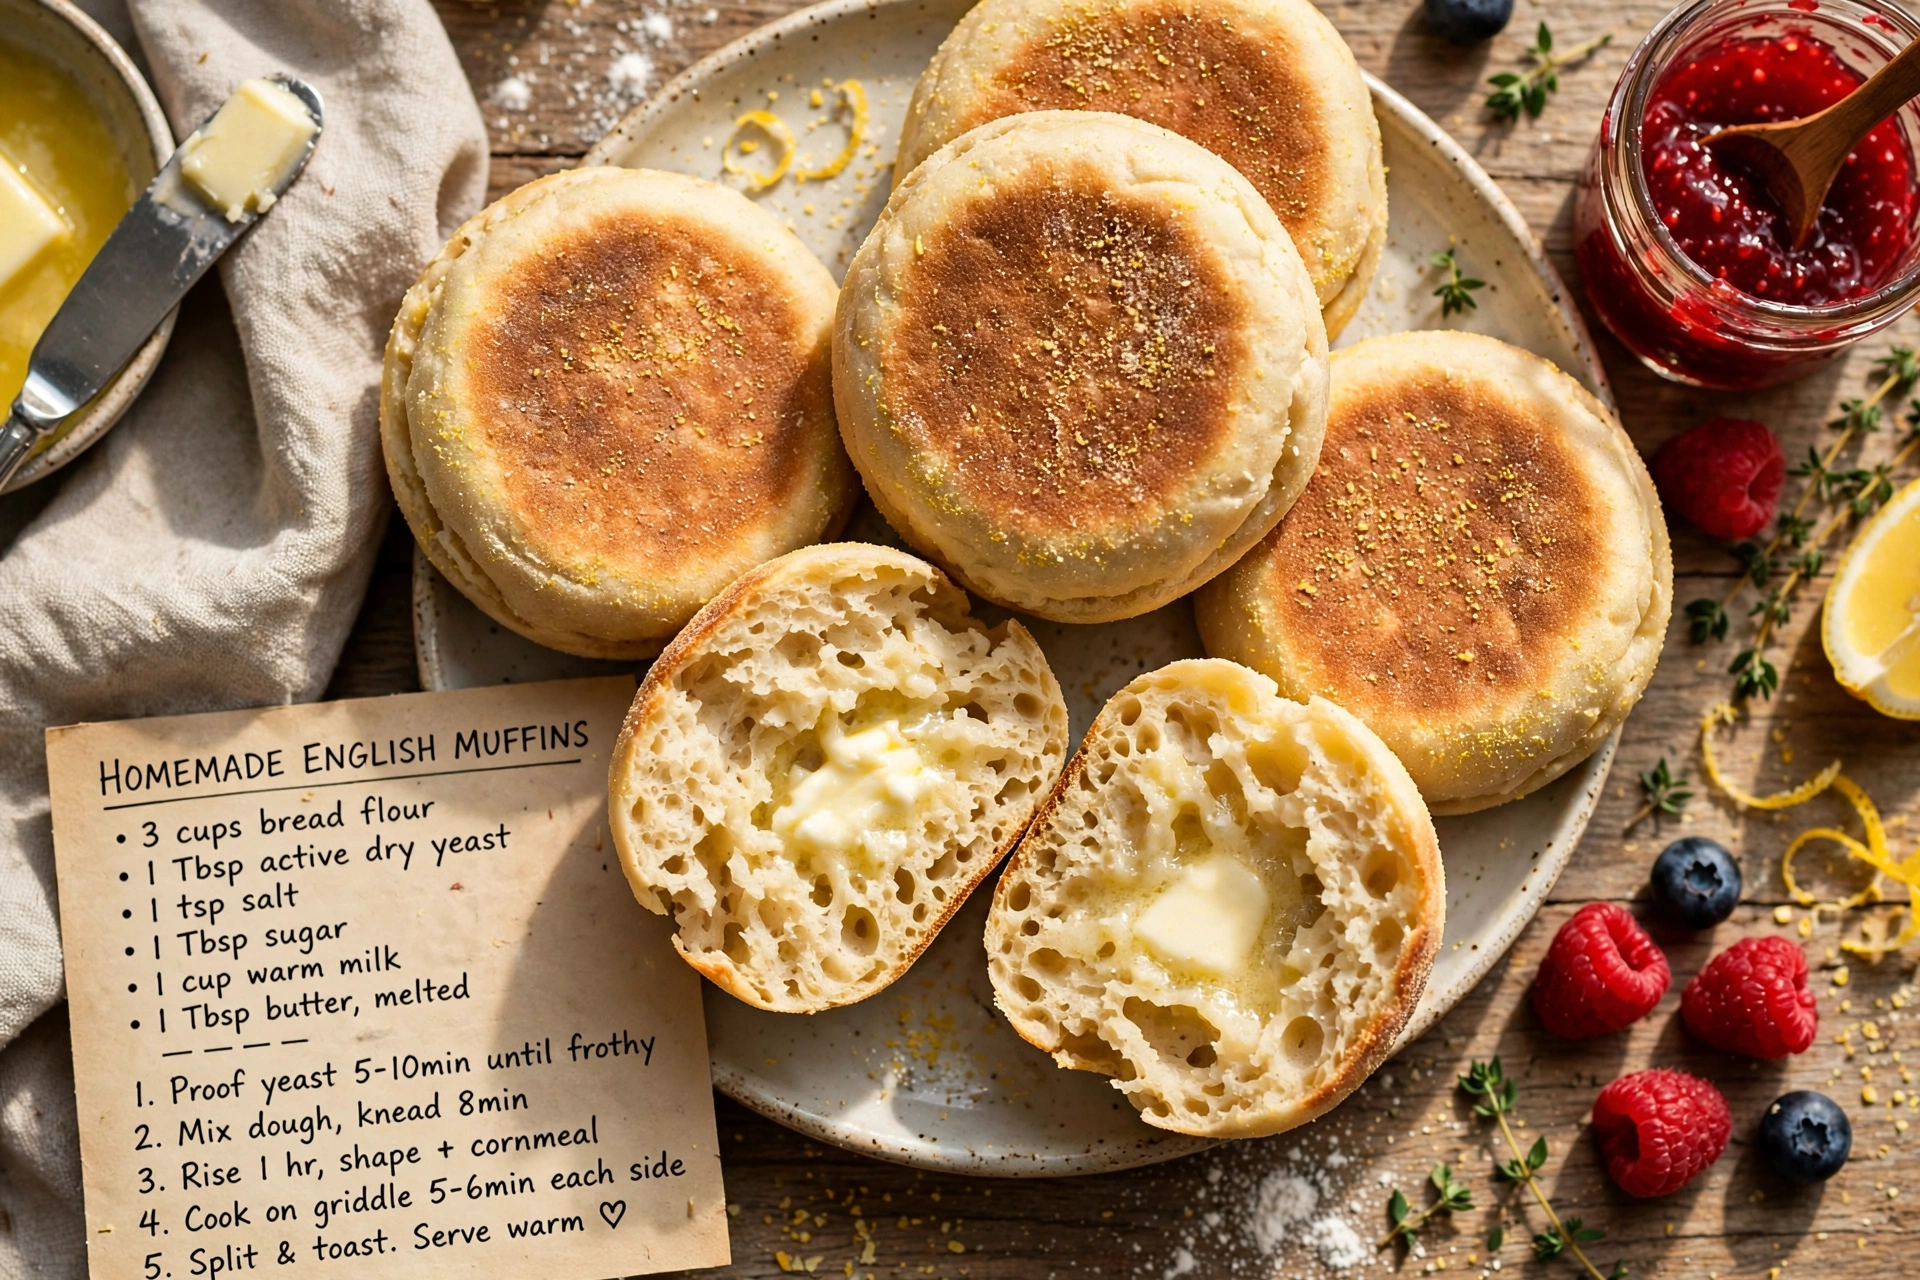
Homemade English Muffins
Fluffy, nook-and-cranny homemade English muffins made from scratch with buttermilk and cooked on the stovetop. This easy from-scratch breakfast recipe beats store-bought every time.
Why You Need This From Scratch Breakfast Staple
There is something deeply satisfying about pulling apart a warm, homemade English muffin and watching butter melt into every little nook and cranny. If you have only ever known the store-bought version, this recipe for homemade English muffins is about to change your entire breakfast routine. They are griddle cooked instead of baked, which gives them that classic golden, slightly crisp exterior and a soft, chewy crumb inside that is nearly impossible to buy in a package.
This is one of those foods from scratch recipes that looks intimidating but is actually incredibly forgiving. No fancy equipment, no complicated shaping, just a soft buttermilk dough, a hot skillet, and a little patience while it rises.
Before we get cooking, the right tools and ingredients make a real difference here. A good heavy bottomed skillet or griddle helps the muffins cook low and slow without scorching, and fresh, properly proofed yeast is what gives you those signature air pockets. These are the products that genuinely help this recipe shine:
The Secret to Real Nooks and Crannies
The hallmark of a great English muffin is not how it looks from the outside, it is what happens when you split it open. Those irregular little tunnels are formed by a wetter than usual dough and a proper rise, not by any special trick or tool.
- Keep the dough soft and slightly sticky rather than adding extra flour to make it easier to handle
- Let the yeast mixture get properly foamy before mixing it in, this confirms your yeast is active
- Avoid pressing down too hard when patting out the dough, you want to preserve those air bubbles
Chef's Tip: Always split your finished muffins with the tines of a fork, working all the way around the edge, rather than slicing with a knife. A knife seals the crumb flat, while forking tears it open naturally and creates all those buttery little pockets.
Buttermilk Makes All the Difference
This is one of those recipes that include buttermilk for a very good reason. The natural acidity in buttermilk tenderizes the gluten in the dough, giving you a softer, more delicate crumb than a plain water and yeast dough could ever achieve. It also lends a faint tang that balances beautifully against butter and jam.
If you are searching for an English muffin recipe with no milk in the pantry, do not worry. A simple buttermilk substitute works just fine here, and I have included one in the FAQ below. Either way, this remains a genuinely satisfying fresh flour recipe that turns a handful of pantry staples into something bakery worthy.
A Note on Cooking Temperature
Unlike most bread, these muffins are not baked in the oven, they are cooked low and slow on a skillet or griddle. This is the step people most often rush, and rushing it is the number one reason muffins end up doughy in the middle. Keep your heat on low to medium low and be patient. You are looking for a deep golden crust on both sides and a fully cooked interior, which usually takes 7 to 9 minutes per side.
Ready to make it? Here is the full step by step recipe:
Homemade English Muffins
Fluffy, nook-and-cranny homemade English muffins made from scratch with buttermilk and cooked on the stovetop. This easy from-scratch breakfast recipe beats store-bought every time.
Ingredients
- 3 1/2 cups all-purpose flour, plus more for dusting
- 1 cup buttermilk, warmed slightly, not hot
- 3/8 cup water, warm, 105 to 110 degrees F
- 2 1/4 tsp active dry yeast, one standard packet
- 1 tbsp granulated sugar
- 2 tbsp unsalted butter, melted and slightly cooled
- 1 1/4 tsp fine sea salt
- 1/4 tsp baking soda
- 3 tbsp cornmeal, for dusting, fine or medium grind
Instruction
In a small bowl, combine the warm water, yeast, and sugar. Let sit for 5 to 10 minutes until foamy.
In a large mixing bowl or stand mixer, whisk together the flour, salt, and baking soda.
Add the warmed buttermilk, melted butter, and the foamy yeast mixture to the dry ingredients.
Mix with a dough hook or wooden spoon until a soft, slightly sticky dough forms, about 3 to 4 minutes. The dough will be much wetter than a standard bread dough, resist adding too much extra flour.
Cover the bowl with a clean towel or plastic wrap and let rise in a warm spot for 1 to 1.5 hours, until doubled in size.
Generously dust a work surface and a baking sheet with cornmeal.
Turn the dough out onto the floured surface and gently pat it into a slab about 3/4 inch thick, being careful not to deflate it too much.
Cut out rounds using a 3-inch biscuit cutter or a clean can, dipping the cutter in flour between cuts. Gather scraps and gently repat to cut a few more.
Place the rounds on the cornmeal-dusted baking sheet, dust the tops with more cornmeal, and let rest uncovered for 20 to 30 minutes.
Heat a large skillet or griddle over low to medium-low heat and lightly grease it.
Cook the muffins in batches for 7 to 9 minutes per side, until deep golden brown and cooked through, adjusting heat as needed so they do not burn before the inside sets.
Transfer to a wire rack to cool for at least 10 minutes before splitting with a fork.
Split each muffin with the tines of a fork all the way around, then gently pull apart to reveal the nooks and crannies. Toast and serve with butter and jam.
Equipment
- Large mixing bowl
- Stand mixer with dough hook (optional)
- 3-inch biscuit cutter
- Baking sheet
- Large skillet or griddle
- Wire cooling rack
- Fork for splitting
Notes
Serving, Storing, and Make Ahead Tips
Once you have a batch of these cooling on the rack, the options are endless. Split and toasted with salted butter and good jam is the classic move, but they also make an incredible base for breakfast sandwiches with eggs and cheese, or even a quick eggs Benedict at home.
These muffins freeze exceptionally well, which makes this a fantastic recipe for homemade English muffins to double up on. Cool them completely, split with a fork, and freeze in a bag. When you are ready, just pop the frozen halves straight into the toaster.
If you happen to own an English muffin recipe for bread machine adaptation, you can absolutely use your machine's dough cycle to handle the mixing and first rise here, then pick up at the shaping step. It saves a little hands on time while still giving you that same homemade texture.
Chef's Tip: Resist eating them the moment they come off the griddle. Letting them cool for at least 10 minutes firms up the crumb structure and makes them much easier to split cleanly with a fork.
However you serve them, once you taste a warm, from scratch English muffin fresh off the griddle, it is hard to go back to the plastic wrapped kind from the grocery store shelf.